커맨드 패턴 (Command)

객체의 내부 동작 하나 하나보다, 어떤 동작을 한다는 것 자체가 중요할 때가 있습니다. 캐릭터에게 행동을 시킬 때, 어떤 행동을 하는지는 중요하지 않고, 행동을 한다는 그 자체만 중요할 때가 바로 그렇습니다.

이렇게 행동을 일반화하는 것을 커맨드 패턴이라고 부르고, 캡슐화의 구현이라고 보셔도 좋습니다.

다만 일반 캡슐화와는 조금 다른것이, 커맨드 패턴은 한 클래스당 한가지 일만 시키는 경우가 많다는 것입니다. 동작 하나를 하나의 클래스로 관리함으로써, 다양한 동작을 관리하기 쉽게 하겠다는 것이지요.

class ICommand

{

public:

        virtual void Act() = 0;

};


class CCharacterParent : public ICommand

{

protected:

        virtual CCharacterParent * SearchTarget() = 0; //타겟찾기

        virtual void Act(CCharacterParent *a_pcCharaterParent) = 0; //공격

public:

        virtual void Act(){

               Act(SearchTarget());

        }

};


class CMonster : public CCharacterParent

{

        virtual CCharacterParent * SearchTarget()

        {

               //사정거리내의캐릭터를찾는다.

        }


        virtual void Act(CCharacterParent *a_pcCharaterParent)

        {

               Attack(a_pcCharaterParent);

        }


        void Attack(CCharacterParent *a_pcCharaterParent)

        {

               //파라미터로넘어온캐릭터를공격한다.

        }

};


class CPet : public CCharacterParent

{

        virtual CCharacterParent * SearchTarget()

        {

               //가장약한아군캐릭터를찾는다

        }


        virtual void Act(CCharacterParent *a_pcCharaterParent)

        {

               Heal(a_pcCharaterParent);

        }


        void Heal(CCharacterParent *a_pcCharaterParent)

        {

               //파라미터로넘어온캐릭터를회복시킨다

        }

};


void Act(ICommand *a_piCommand)

{

        a_piCommand->Act();

}

외부에서는 캐릭터가 공격을 하던, 회복을 시켜주던 상관없습니다. 해당 캐릭터가 행동한다는 그 자체가 중요하죠.

이렇듯 객체의 내부 행동을 숨기고, 외부 인터페이스를 일반화하는 것을 커맨드 패턴이라 합니다.


원작자 엘키

http://elky.tistory.com/124

프록시 패턴 (Proxy)

어떤 객체가 수행하는 기능을 그대로 수행하면서, 부가적인 기능을 수행하거나 기존 역할을 대행하기 위해 새 클래스를 정의하고, 새로 정의된 클래스를 통해서 외부와 통신하는 것을 프록시 패턴이라고 합니다.

class IObject

{

public:

        virtual void Use() = 0;

};


class CQuickSlot

{

        IObject *m_piObejct;

public:

        bool isExist(){

               return m_piObejct != NULL ? true : false;

        }


        void Use(){

               if(m_piObejct)

                       m_piObejct->Use();

        }

};


class CQuickSlotProxy

{

        CQuickSlot *m_pcQuickSlot;

public:

        CQuickSlotProxy() : m_pcQuickSlot(NULL)

        {


        }


        ~CQuickSlotProxy()

        {

               if(m_pcQuickSlot)

                       delete m_pcQuickSlot;

        }


        bool isExist(){

               if(m_pcQuickSlot)

                       return m_pcQuickSlot->isExist();


               return false;

        }


        bool Use(){

               if(m_pcQuickSlot){

                       m_pcQuickSlot->Use();

                       return true;

               }


               //bool형으로바뀌면서실제사용했는지여부를알수있게되었다.

               return false;

        }

};

void형에서 bool형으로 바뀐 use함수에서는 아이템 사용을 성공 여부를 알릴 수 있도록 기능이 확장되었으며, CQuickSlot 클래스에 변화를 가하지 않고도 기능 확장이 가능해졌습니다. 예를 들어, CQuickSlot의 Use함수 호출 횟수 계산 기능을 추가한다 했을 때에도 CQuickSlot 클래스를 변경할 필요 없게 되는 잇점이 생기게 되는 것이죠.


원작자 엘키

http://elky.tistory.com/124

Microsoft C/C++ 컴파일러를 이용하여 명령행(command-line)에서 DLL을 컴파일-링크하는 과정을 설명하려고 한다.


다음의 소스 파일들이 있다.


dlllib.h: dlllib.c와 dlltest.c에서 include하는 헤더

dlllib.c: DLL 소스 파일

dlltest.c: 애플리케이션 소스 파일


1. DLL 만들기


cl /c dlllib.c

link dlllib.obj /dll


2. 실행 파일 만들기


cl dlltest.c dlllib.lib


3. 샘플 코드


3-1. dlllib.h

/*
dlllib.h: dlllib DLL 관련 헤더

dlllib.c와 dlltest.c에서 include해서 사용한다.
*/
#ifdef __cplusplus
#define EXPORT extern "C" __declspec(dllexport)
#else
#define EXPORT __declspec(dllexport)
#endif


EXPORT void print();


3-2. dlllib.c

/*
dlllib.c: dlllib.dll을 만들기 위한 소스 코드

컴파일: cl /c dlllib.c
링크: link dlllib.obj /dll
*/
#include <windows.h>
#include <stdio.h>
#include "dlllib.h"


int WINAPI DllMain(HINSTANCE hInstance, DWORD fdwReason, PVOID pvReserved)
{
    return TRUE;
}


void print()
{
    printf("print()\n");
}


3-3. dlltest.c

/*
dlltest.c: dlltest.exe를 만들기 위한 소스 코드

컴파일: cl dlltest.c dlllib.lib
*/
#include <windows.h>
#include "dlllib.h"


int main()
{
    print();
}

  Memory leakage... C++, C를 사용하는 사람들은 늘 자주자주 보는 문제입니다. 사실 분명히

내가 짠 코드는 이런 누수현상이 없다라구 하구 또 많은 Tool들을 통해서 찾는다고 하지만 사실 해법이 마땅히 없는 것은 사실입니다.


   최근에는 DevPartner에서 코드오류를 낸다는 부분 때문에 delete하는 부분을 지웠다가 옴팡지게 Memory leakage의 오명을 뒤집어 쓰고 결국 Team전체에 케익을 사는 엄청난 댓가를 치루고 말았습니다. 결국 DevPartner같은 Tool들도 못믿는다는 이야기입니다. 게다가 이런 Tool들은 무지하니 많은 Message를 내보내기는 합니다만 궁극적으로 중요한 정보를 찾을 수 없게 할 경우도 있습니다.


  http://www.codeproject.com/cpp/MemFailTest.asp에 보면 이것들을 매우 저렴하게(?)잘 해결할 수 있는 방법이 나옵니다. 어떻게 하는 것일까요?


 우선 우리가 만드는 new, malloc같은 것들이 잡는 것은 전체 메모리 영역에서 만드는 것이 아니라 heap이라는 영역에서 메모리를 잡는 것입니다. 일반적으로 Win32 system은 4G memory를 잡고 있습니다. 2G는 OS가 미리 점유하고 있고 나머지 2G를 사용하는 것입니다. 이 안에 사용자가 잡았다가 날렸다가 하는 영역이 바로 heap입니다.


 이 영역들을 분석해주는 함수들을 이용하면 됩니다. 단 아래 소개하는 Function들은 Windows에 해당하는 이야기입니다. UNIX에서는 다른 것으로 알고 있습니다.


 아래 예제로 설명해 드리겠습니다.


==================================

#include <stdio.h>
#include <string.h>
#include <crtdbg.h>
#ifndef _CRTBLD
#define _CRTBLD
#include <dbgint.h>
#endif  //꼭꼭 위의 헤더파이들을 추가해 주세요. 

int main(void)
{
   _CrtSetReportMode(_CRT_WARN, _CRTDBG_MODE_FILE);
   _CrtSetReportFile(_CRT_WARN, _CRTDBG_FILE_STDOUT );


   _CrtMemState memstate1, memstate2, memstate3 ; // 메모리 상태를 알려주는 구조체들입니다. 
   _CrtMemCheckpoint(&memstate1) ; // 메모리 상태를  memstate1에 기록합니다. 


    int *x = new int(1177) ;// allocated
    char *f = new char[50] ; // allocated
    strcpy(f, "Hi Naren") ;
    delete x ; // freed, 
    _CrtMemCheckpoint(&memstate2) ; // 메모리 상태를  memstate2에 기록합니다.


    //두개의 Memory 상태 구조체를 비교합니다. 현재 char* f block을 지우지 않았습니다.

   //그러므로 이것 떄문에 debug heap에 의해 error를 잡아내야 합니다.

   if(_CrtMemDifference(&memstate3, &memstate1, &memstate2))  //문제가 있으면 true를 return 합니다. 
   {    
      printf("\nOOps! Memory leak detected\n") ;
      _CrtDumpMemoryLeaks() ; 
      //대신에 _CrtMemDumpAllObjectsSince()를 이용할 수도 있습니다.

   }
   else
      printf("\nNo memory leaks") ;
      return 0 ;
}

==================================


위의 예제를 돌리면 Visual Studio Output 윈도우에 아래처럼 뜹니다.

===========================================

OOps! Memory leak detected
Detected memory leaks!
Dumping objects ->
{42} normal block at 0x002F07E0, 50 bytes long.
Data: <Hi Naren        > 48 69 20 4E 61 72 65 6E 00 CD CD CD CD CD CD CD
Object dump complete.

===========================================


위의 data값들을 가지고 찾아보면 됩니다. 한데 맨날 이렇게 어렵게어렵게 해야 될까요?

아래 코드들은 위의 방법들을 또 잘 정리해놓은 것들입니다. 더 자세하게 해서 Blog에 올려놓을께요.


http://www.codeproject.com/tools/visualleakdetector.asp

http://www.codeproject.com/cpp/MemLeakDetect.asp

http://www.codeproject.com/debug/Memory_leak_finder.asp

첨부파일 내용


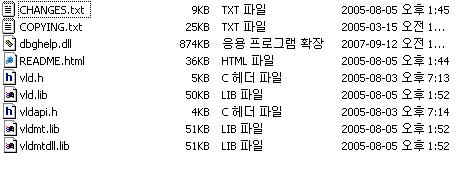
설치 방법


1. 라이브러리 파일(vld.lib, vldmt.lib, vldmtdll.lib)을

C:\Program Files\Microsoft Visual Studio\VC98\Lib 에 복사한다.


2. 헤더 파일(vld.h, vldapi.h)을

C:\Program Files\Microsoft Visual Studio\VC98\Include 에 복사한다.


3. 프로그램이 시작하는 소스 파일 (App.h나 main함수가 있는 파일)에 vld.h 파일을 포함한다.

#include "vld.h"   을 최상위 라인에 적는다. 단, stdafx.h 파일을 포함할 경우, 그 다음 라인에 적는다.


4. 만약 운영 프로그램이 Windows2000 또는 이하 버전이라면 dbghelp.dll 파일을 프로그램의 Debug 폴더에 복사한다. 


5. 프로그램을 디버그 버전으로 빌드한다.


* 유의 사항 *


1. 사용자의 프로그램 경로에 한글이 있을경우 추적경로가 잘려서 제대로 나오지 않은 경우도 있음.

  ==> 이럴경우 폴더나 프로그램 이름을 영문으로 수정해야 함.


2. static, extern 선언 변수와 같이 프로그램이 종료되기 직전에 메모리를 해제하는 변수는 메모리릭으로 보여지는 경우도 있다.

 ==> vld가 실행되는 시점이 변수 해제 전이기 때문이다. app 파일에 최상위 라인에 적어도 해결이 안될 경우가 있으므로, 추적라인의 메모리 해제 부분이 있을 경우 브레이크를 걸어서 프로그램이 종료되고 들어오는 경우 그냥 넘어가도 될듯하다..;

1. 읽기전용 속성 제거


2. *.scc 파일, *.vssscc 파일, *.vspscc 파일 제거


3. sln 파일 텍스트에디터로 열어서

GlobalSection(SourceCodeControl)=preSolution
:
:
EndGlobalSection (첫번째)까지 제거


4. vcproj 파일을 텍스트에디터로 불러 "SAK"라고 적힌 부분 제거

alloc_text auto_inline bss_seg check_stack
code_seg comment component conform
const_seg data_seg deprecated function
hdrstop include_alias init_seg inline_depth
inline_recursion intrinsic managed message
once optimize pack pointers_to_members
pop_macro push_macro runtime_checks section
setlocale unmanaged vtordisp warning


#pragma 다음에 올수 있는  텍스트 구문


#pragma comment 다음에 올수 있는 문구는 다음과 같다.

compiler 
exestr
lib
linker /DEFAULTLIB 
linker /EXPORT 
linker /INCLUDE 
linker /MERGE 
linker /SECTION 
linker /ENTRY
user


사용예
#pragma comment( user, "Compiled on " __DATE__ " at " __TIME__ )


linker의 경우에 다음에 올수 있는 항목이다.

/ALIGN Specifies the alignment of each section. 
/ALLOWBIND Specifies that a .dll cannot be bound.
/BASE Sets a base address for the program.
/DEBUG Creates debugging information.
/DEBUGTYPE Creates particular formats of debugging information.
/DEF Passes a module-definition (.def) file to the linker.
/DEFAULTLIB Searches specified library when resolving external references.
/DELAY Controls the delayed loading of DLLs.
/DELAYLOAD Causes the delayed loading of the specified DLL.
/DLL Builds a DLL.
/DRIVER Creates a Windows NT kernel mode driver.
/ENTRY Sets the starting address.
/EXETYPE Builds a virtual device driver.
/EXPORT Exports a function.
/FIXED Creates a program that can be loaded only at its preferred base address.
/FORCE Forces link to complete in spite of unresolved or multiply defined symbols.
/GPSIZE Specifies the size of communal variables for MIPS platforms.
/HEAP Sets the size of the heap in bytes.
/IMPLIB Overrides the default import library name.
/INCLUDE Forces symbol references.
/LARGEADDRESSAWARE Tells the compiler that the application supports addresses larger than two gigabytes.
/LIBPATH Allows the user to override the environmental library path.
/LINK50COMPAT Generates import libraries in eMbedded Visual C++ Version 5.0 format.
/MACHINE Specifies the target platform.
/MAP Creates a map file.
/MAPINFO Includes the specified information in the map file.
/MERGE Combines sections.
/NODEFAULTLIB Ignores all (or specified) default libraries when resolving external references.
/NOENTRY Creates a resource-only DLL.
/NOLOGO Suppresses startup banner.
/OPT Controls LINK optimizations.
/ORDER Places COMDATs into the image in a predetermined order.
/OUT Specifies the output file name.
/PDB Creates a program database (.pdb) file.
/PDBSTRIPPED Do not place private symbols in the database (.pdb) file.
/PDBTYPE Specifies where to store the Program Database (PDB) debug type information.
/RELEASE Sets the checksum in the .exe header.
/SECTION Overrides the attributes of a section.
/STACK Sets the size of the stack in bytes.
/STUB Attaches an MS-DOS stub program to a Win32 program.
/SUBSYSTEM Tells the operating system how to run the .exe file.
/SWAPRUN Tells the operating system to copy the linker output to a swap file before running it.
/VERBOSE Prints linker progress messages.
/VERSION Assigns a version number.
/VXD Creates a virtual device driver (VxD).
/WARN Specifies warning level.
/WINDOWSCE Specifies bitmap conversion.
/WS Aggressively trim process memory.

#pragma는

- 각각의 컴파일마다 독립적인 기능을 제공하기 위하여 이용(다른 컴파일에서는 처리 안 될 수 있음)
- VC++에서는 많은 pragma directives가 있음(alloc_text, auto_inline, bss_seg, check_stack, code_seg, comment, component, conform, const_seg, data_seg, deprecated, function, hdrstop, include_alias, init_seg, inline_depth, inline_recursion, intrinsic, managed, message, once, optimize, pack, pointers_to_members, pop_macro, push_macro, runtime_checks, section, setlocale, unmanaged, vtordisp, warning)
- 정의 안 된 pragma directives를 사용하면 단순히 경고(warning C4068: unknown pragma)만 output 창에 출력하고, 무시됨
- 많이 사용하는 것 몇 가지만 앞으로 살펴볼 것임
- 이번시간에는 once, warning

1.#pragma once
이는 중복 include하는 것을 막는 것이다.
만일 중복 include가 되면, error C2011: 'CA' : 'class' type redefinition

#ifndef _A_H_
#define _A_H_
class CA {
...
}
#endif
와 

#pragma once
class CA {
...
}
는 동일한 것이다.

VC++에서 자동으로 class를 만들면 
#if _MSC_VER > 1000
#pragma once
#endif // _MSC_VER > 1000
라는 코드가 삽입되어 있는데, 이는 #pragma once가 VC++버전이 1000이상인 곳에서만 의미가 있기 때문이다.(Visual C++ 5.0 => 1100, Visual C++ 6.0 => 1200, Visual C++ .NET 2003 => 1310, Visual C++ 2005 => 1400)

2.#pragma warning(disable : 4244; once : 4101; error : 4700)
소스를 컴파일하면 error와 warning이 나타나는데, warning의 경고수준을 결정하는 것임
거의 쓸 일은 없지만, 재미로 한번 살펴보기만 하자.

void main() {
    double f;
    int k1, k2;
    int n=f;
}
이를 컴파일하면 output창에 아래의 warning이 나타난다.
warning C4244: 'initializing' : conversion from 'double' to 'int', possible loss of data
warning C4101: 'k1' : unreferenced local variable
warning C4101: 'k2' : unreferenced local variable
warning C4700: local variable 'f' used without having been initialized
0 error(s), 4 warning(s)

이때 disable은 해당 warning이 output창에 나오지 않도록 무시하라는 지정
once는 동일한 warning에 대해 한번만 나오라는 것
error는 해당 warning을 error로 취급하라는 것이다.

#pragma warning(disable: 4244)
#pragma warning(once: 4101)
#pragma warning(error: 4700)
void main() {
    double f;
    int k1, k2;
    int n=f;
}
을 컴파일하면
warning C4101: 'k1' : unreferenced local variable
error C4700: local variable 'f' used without having been initialized
1 error(s), 1 warning(s)
가 나오는 것을 알 수 있다.

하지만 warning을 소홀히 하는 것은 매우 좋지 않은 습관이다. 
warning도 꼭꼭 해결하고 넘어가도록 하자. 
void main() {
    double f=0.;
    int n=(int)f;


오늘은 #pragma pack()을 설명한다.
별로 중요하지 않다. 기존의 struct member alignment만 반드시 알고 있으면 된다.
이번시간에는 struct member alignment를 어떻게 설정하는지에 대해서 설명을 한다.

1.전역적으로 struct member alignment 설정 방법
struct member alignment의 기본값은 8이라고 했다. 
맞는지, 그리고 어떻게 설정하는지 살펴보자.

Project>Settings => C/C++에서 Category를 Code generation으로 선택하면,


Struct member alignment가 "8 Bytes *"로 선택되어 있는 것을 볼 수 있다.


이를 만일 4Bytes로 변경을 하면, 아래의 Project options(컴파일 옵션임)의 /Zp4로 변경됨을 볼 수 있다(/Zp 표시가 없으면 default 8, Project options에서 직접 수정을 해도 반영됨).


2.지역적으로 struct member alignment 설정 방법
#pragma pack을 이용하여 struct member alignment을 설정할 수 있다.

사용방법은 
#pragma pack(n) //n=1, 2, 4, 8, 16
#pragma pack() //default 값으로 설정

위의 보기처럼
int n=2;
#pragma pack(n)
으로 하면, warning C4079: unexpected token 'identifier', warning C4081: expected 'newline'; found ')' 두개의 warning이 나타나고 적용이 되지 않는다. 이는 #pragma가 preprocessor에 의해 동작이 되는데, 이때 n의 값은 알 수가 없기 때문이다. n대신 직접적으로 숫자(#pragma pack(2))를 써주거나, #define된 것으로 설정해야한다.

//default 8
struct A {
char c;
int i;
};
printf("%s ", sizeof(A)); //4+4

부분의 struct member alignment를 2로 설정하고 싶으면,

#pragma pack(2)
struct A {
char c;
int i;
};
#pragma pack() //default 값으로 복원
printf("%s ", sizeof(A)); //2+4
이 된다. 보통 통신 프로그램에서 데이터를 보낼 때 #pragma pack(1)로 설정을 하여, padding을 모두 없애고 실제 데이터만 보내고, 받는 쪽에서도 동일하게 받도록 작성을 한다.

#pragma pack(n)은 다른 #pragma pack(n) 또는 #pragma pack()을 만날 때까지 모든 struct, class의 struct member alignment에 적용이 된다.

만일 A.h 파일의 전체 struct, class의 struct member alignment를 1로 설정하고 싶다면,
#pragma pack(1)
#include "A.h"
#pragma pack()
을 하면 된다.

하지만 강제로 struct member alignment를 설정하는 것은 default 값보다는 처리속도가 느려진다. 그래서 이런 것이 있다는 것 정도만 알고 넘어가고, 이전에도 말했듯이, 접근자(., ->)를 이용하여 struct member를 명시적으로 접근하여 사용하기를 바란다.

#pragma message, #pragma comment 두 가지를 살펴본다.

1.#pragma message는 몰라도 되지만, 구경만 해보자.
사용방법은 #pragma message( messagestring ) 이다.

//Test1.cpp
void main() {
#pragma message( "I have got to lose my love handles." )
}
를 컴파일하면 Build창(컴파일 결과-warning/error가 나오는 창)에 
--------------------Configuration: Test1 - Win32 Debug--------------------
Compiling...
Test1.cpp
I have got to lose my love handles.
Linking...

Test1.exe - 0 error(s), 0 warning(s)

이 나오는 것을 알 수 있다. 이런 간단한 역할을 하는 것이 #pragma message이다.
연인에게 소스코드를 선물(^^)로 줄 때 간단한 메시지를 #pragma message에 넣어서 보내는데 쓸 수 있을까나? 사실 몇몇의 프로그래머들은 다양한 목적(이전 작업시간, 다음에 할일, 다음에 작업할 위치지정 등 표시)으로 사용을 하기도 하지만, 내가 볼 때는 사랑의 메시지 외에는 별 필요가 없을 것 같다. 바람님에게 추천한다. ^^

2.#pragma comment는 매우 많이 사용되니 알아두면 편리하다.
프로그램을 작성할 때 다양한 라이브러리를 사용한다. 이러한 라이브러리를 지정하기 위해서 일반적으로 Project>Settings=>Link>Object/library modules:에 추가를 한다.
만일 Debug 모드에서 ad.lib, Release 모드에서 a.lib를 이용한다면, 아래와 같이 두 번에 걸쳐서 설정을 해주어야 한다. 얼마나 불편한가. 불편하지 않을 수도 있지만. ^^. 또한 소스를 배포할 때 이에 대한 설명을 문서에 달아야 한다. 보기에 좋지 않다. 사람마다 다르겠지만. ^^.


이러한 일을 소스코드에서 처리를 하는 역할이 #pragma comment이다.
만일 소스코드에 아래와 같이 작성을 하면 위와 동일한 것이다.
#ifdef _DEBUG
#pragma comment( lib, "ad.lib" )
#else
#pragma comment( lib, "a.lib" )
#endif

사용방법은 #pragma comment( "comment-type" [, commentstring] )이다.
이때 comment-type은 compiler, exestr, lib, linker, user가 될 수 있고, 그에 따라 commentstring이 달라진다. lib와 linker가 특히 많이 사용이 되는데, lib는 방금 배운 것이 전부이고, linker는 상당히 복잡한 개념을 알아야 되기 때문에 이후 관련 분야를 설명한 뒤에 다시 설명하겠다.

나는 보통 stdafx.h에 아래와 같이 설정을 해두고 OpenCV, Camera를 잘 사용하고 있다.
#pragma comment( lib, "./common_opencv/lib/cv.lib" )
#pragma comment( lib, "./common_opencv/lib/highgui.lib" )
#pragma comment( lib, "vfw32.lib" )

이제 #pragma comment( lib, "lib_name" ) 팍팍 사용하도록 하자.

+ Recent posts